
I am often asked to speak on topics relating to metalwork, and give lectures, often including a slideshow, and physical examples. At present I am still not traveling to lecture or teach workshops and masterclasses. I hope to do so again once more people have been vaccinated against Covid. These are usually in conjunction with a workshop I am teaching, as a guest speaker in a class at a learning institution, or as part of a function for a guild or other organization. The most that I require for these presentations is an hour or two, and a space equipped with a projector that will hook up to a laptop computer.
I also hope to return to teaching metalworking to small groups and one on one, with focus on empowering students to realize their designs as independently, and with as much facility as possible. Some of my workshops require a fairly well equipped studio, but others can be done more or less anywhere that there is a sturdy table and good ventilation. In fact I have taught some of them outdoors. Some of these workshops can be completed in an afternoon, but most take all day or several days, and sometimes evening classes can be arranged. Many of the studios at which I teach have links on the Resources page of this web site. If you would like more information or want to arrange for a workshop, do not hesitate to contact me at bill.metalsmith@gmail.com. My rates are reasonable and I am willing to travel to teach, as the situation and my schedule allow.
Currently Available Lectures and Slideshows
Lessons of the Arts and Crafts Movement for Contemporary Metalworkers. This talk takes an hour or less, has many physical examples, and can be done without slides. The focus is on the ethic of the Arts and Crafts Movement as related to the self-empowering DIY movements of today. We also cover regionalism in the arts and sources of inspiration.
Evolution of Metalwork in the Bronze Age. This is very much a slideshow, and can take up to two hours, including question time. It will include many examples of Bronze Age metalwork from the British Isles and Northern Europe. We will also touch on the interpenetration of archaeological evidence, both now and in the recent past.
Understanding The Iron Age Ribbon Torc. In this slideshow we explore one of the most beautiful and enigmatic forms in pre-historic metalwork. We will go into the details of the physical structure of ribbon torcs, and the reconstruction of the process of their manufacture. I will have physical examples as well as slides, and will plan to spend up to two hours on this topic.
History of Casting in Ancient Times. This is a broad survey, with many slides, in addition o physical examples. We will cover the early history, and pre-history of the casting process around the world, including in the Far East and in the Americas. This will include the diversity of casting techniques, and the physical properties of the alloys involved. Allow for one to two hours.
 Hands on Workshops
A more full description of each workshop appears further below on this page.
Ancient Techniques For Modern Metalsmiths requires two to four days, and a moderately well equipped studio with a place for a charcoal hearth.
Anticlastic Forming requires two to four days, and a moderately well equipped studio with one vice for each student.
Creating Rigidity – An Introduction to Decked Forms requires two to four days, and a moderately well equipped studio that will accommodate a great deal of soldering.
Fold Forming requires one to two days and a basic studio, though a rolling mill is helpful.
A Hands On History of Wire requires one to two days, a work space with good light, and a place for a fire.
Introduction to Engraving requires two to four days and a studio with good light. Extra engravers’ blocks are helpful.
Pewter Casting in Soapstone requires two to three days, a sturdy table, good ventilation, and fire resistant surroundings.
Tool Making – A Series of Weekend Workshops requires two days for each of the workshops in the series, and a moderately well equipped studio.
Traditional Carving in Stone requires two to four days, and is best done outdoors, but in a shaded or covered area, such as an awning.
Designing Successful Castings requires four to five days, and a studio that is set up for wax carving and injection.
Fundamentals of Hollowware – A Series of Weekend Workshops requires two days for each of the workshops in the series, and a moderately well equipped studio.
Introduction to Inlay requires two to four days, and a moderately well equipped studio.
Ancient Techniques For Modern Metalsmiths
Understanding how our ancestors manipulated the materials they worked informs and guides us as present day artists. By experimenting with age old processes we come to better understand our materials, and better appreciate the work of those who have gone before.
In this workshop students will start with a silver ingot, and working together with hammer and hand, create a range of wires, patterned moldings, and matrix stamped reliefs. We will discuss the tools used long ago, including beading irons, stone molds, and bronze dies. We will also cover the use of modern tools to streamline ancient processes. Each student will be able to take home samples of the products of this workshop, along with new insights into the past. Simple finished jewelry pieces such as those pictured on the classical jewelry page are also possible, as time and equipment allow.
Students will be expected to bring earplugs, safety glasses, and if possible, small hammers and bench blocks. Students will be provided with a small amount of silver and copper with which to work, and the option for gemstones for final projects.
 Anticlastic Forming
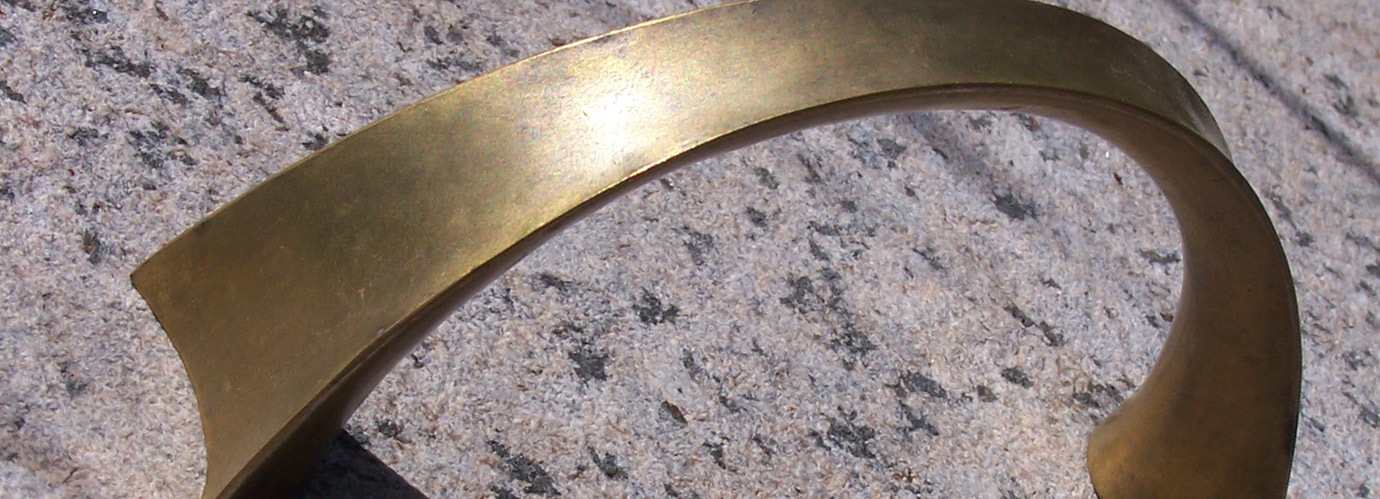
Take the confusion and mystery out of anticlastic forming, as you create beautiful organic looking shapes from sheet metal. In this workshop you will learn the basics of anticlastic raising. In this process a flat sheet of metal is shaped by compressing its center and stretching the edges so that the surface develops two curves at right angles to each other. A saddle is a good example of an anticlastic form. We will focus on “open” or “monoshell” forms made from single pieces of thin sheet metal, working to create striking dimensional shapes.
Though one type open anticlastic form dates from the Iron Age, it is only recently that they have been explored in detail. This new focus has yielded some of the most interesting forms in contemporary metalworking. You do not need a great deal of metalworking experience to take this class, but facility with the hammer is helpful.
Students should bring earplugs and safety glasses, and will be provided with sheet metal and other materials. There will be tool kits available for purchase.
 Creating Rigidity – An Introduction to Decked Forms
When you apply a cover or “decking” to an open form, something interesting. In all cases, the form becomes rigid. Un-decked forms, be they folded, anticlastic or synclastic, may be manipulated so that their curves change to create beautiful and sometimes useful shapes. Once decked, they no longer twist, and hold these new shapes with a remarkable toughness.
In this class you will learn to make patterns and to apply decking to a variety of forms to create beautiful and in some cases functional objects. You need not be an expert metalsmith, but you do need to know how to solder, sear, and file metals. You will need to have already taken an Anticlastic Forming workshop, as we will be making a number of simple anticlastic forms to be decked. If you are familiar with fold forming, that is also a plus. You will be amazed at the diversity of forms you are able to create using this process, and you will marvel at their lightness and toughness.
Students should bring earplugs and safety glasses, and will be provided with sheet metal and other materials. There will be tool kits available for purchase.

Fold Forming
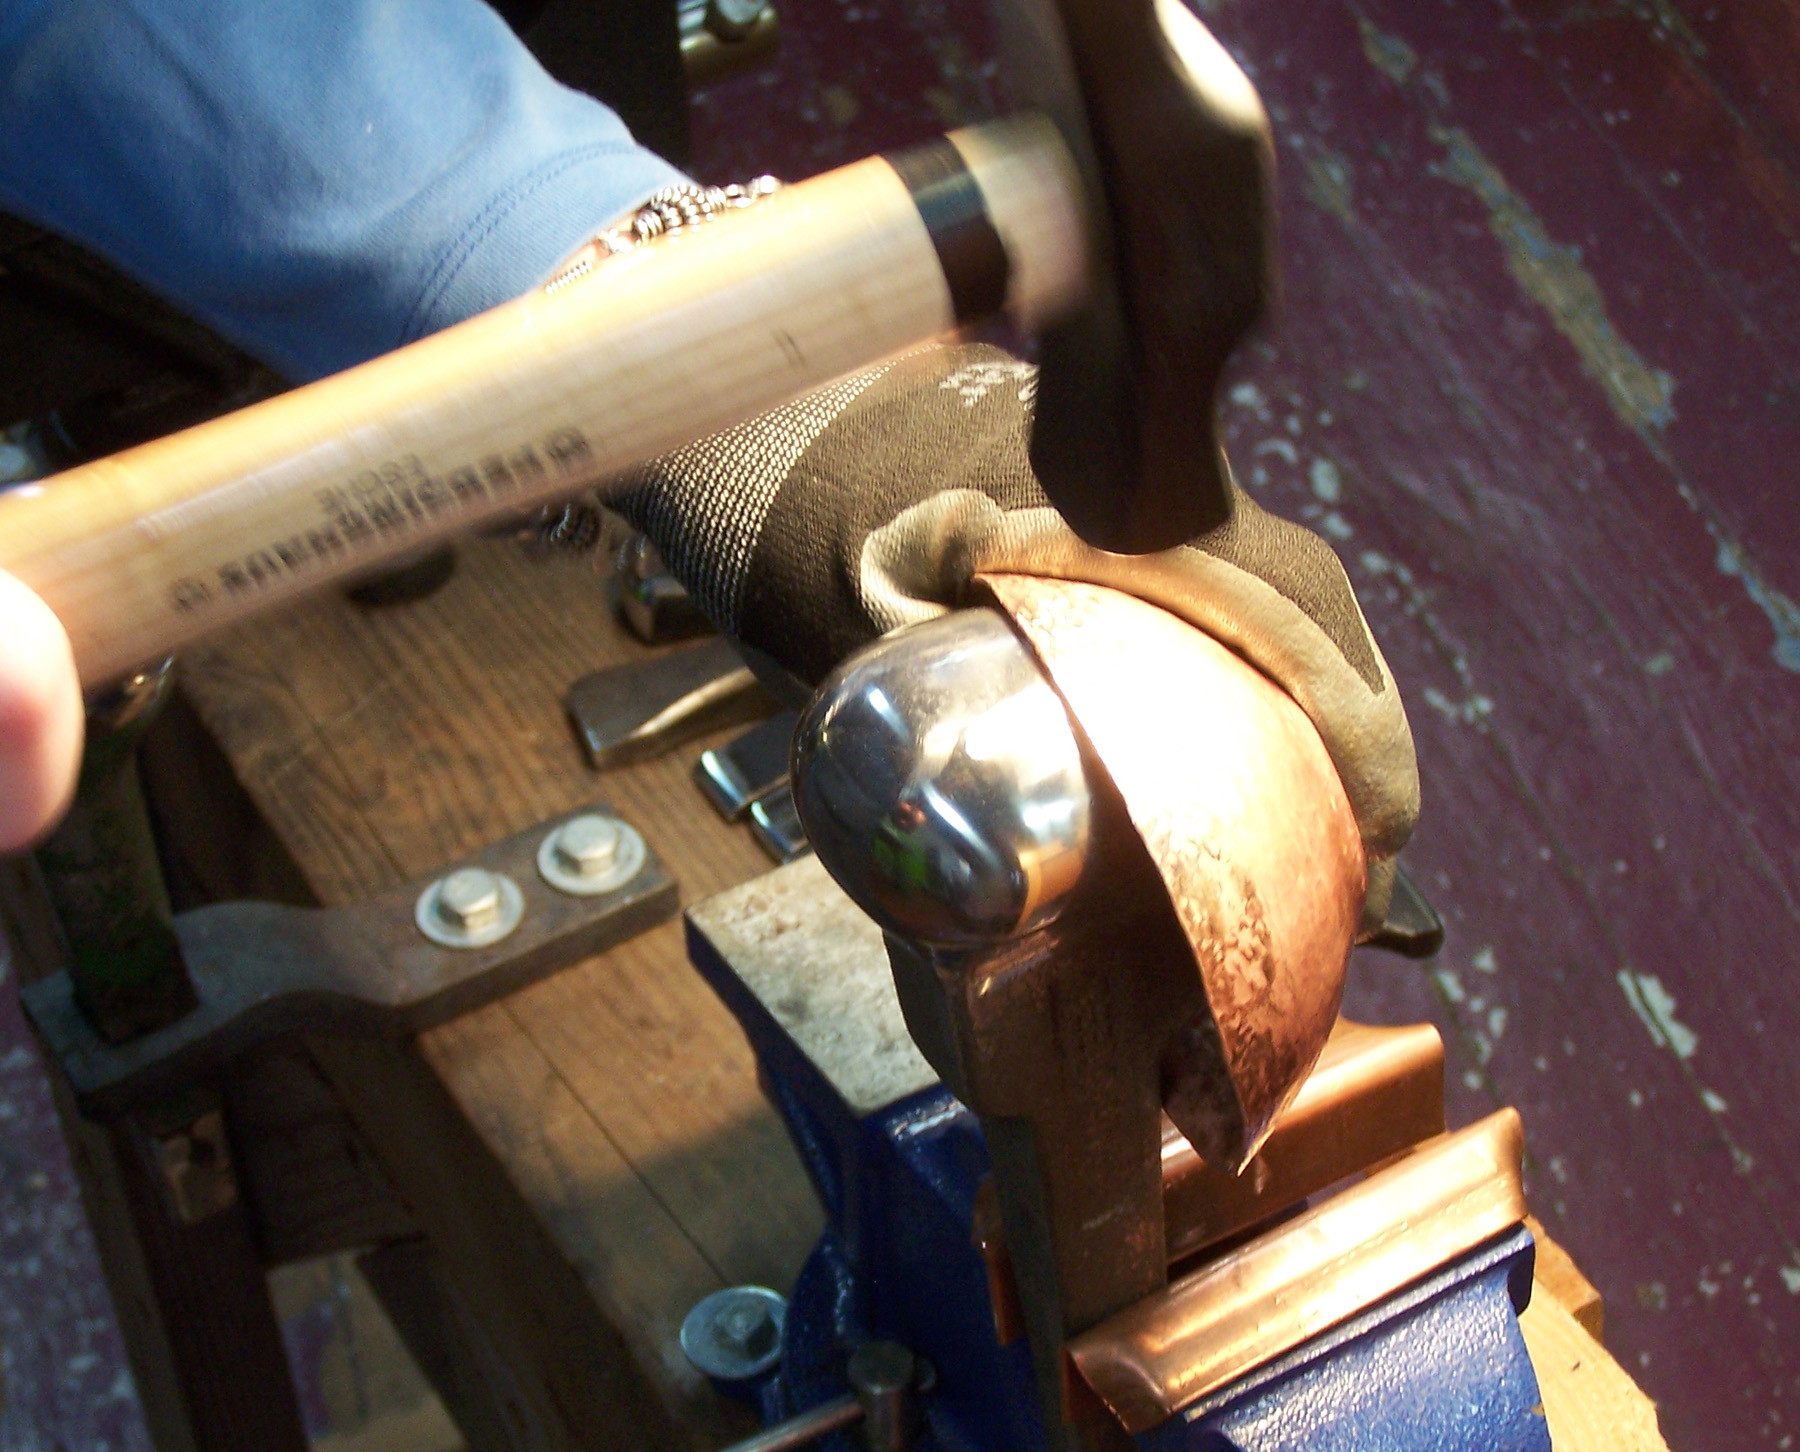
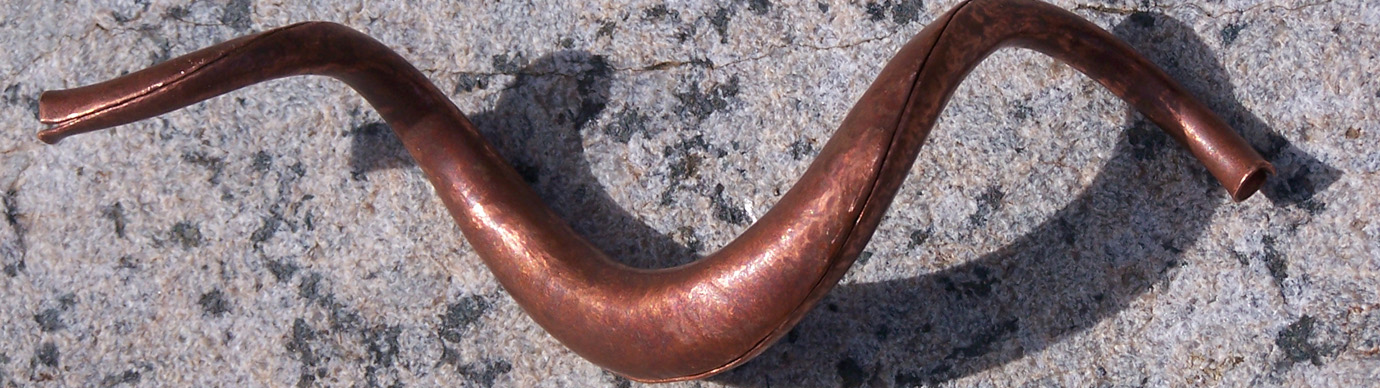
Fold forming is an exciting method for shaping metal quickly, and without the need for many repeated annealing. The metal is worked near to the limit of its malleability making it possible to create forged forms from remarkably thin sheet metal. The natural properties of the metal come through in this process to give these forms an almost organic look; quite different from traditional hammered forms.
In this workshop we will use copper sheet to create a variety of sample fold forms, which may be adapted for use in jewelry designs. We will also have an experimentation, “play with the metal,” session in which we can develop new variations of the standard fold forms.
Students will be expected to bring earplugs, and safety glasses, and will be provided with sheet metal, and other materials. It would be helpful if students who have small hammers and bench blocks would bring them.
A Hands On History of Wire
We don’t think much about wire today, and most of us assume that it has always looked much the same as it does today. However it has evolved a great deal over the millennia, both in appearance and production. In this workshop students will explore wire making techniques, starting with the very beginning, using reproduction stone and bronze tools, and continue right up to modern times, and the use of draw plates. Students will make many examples of wire made using different techniques, including strip twisting, swaging, and bead rolling. We will compare our wires under magnification to micrographs of ancient jewelry pieces. This is a great opportunity both for those interested in living history, and for jewelry artists looking for a deeper understanding of metalworking.
Students should wear sturdy fire resistant clothing, gloves. A small amount of silver will be provided for making samples.
 Introduction to Engraving
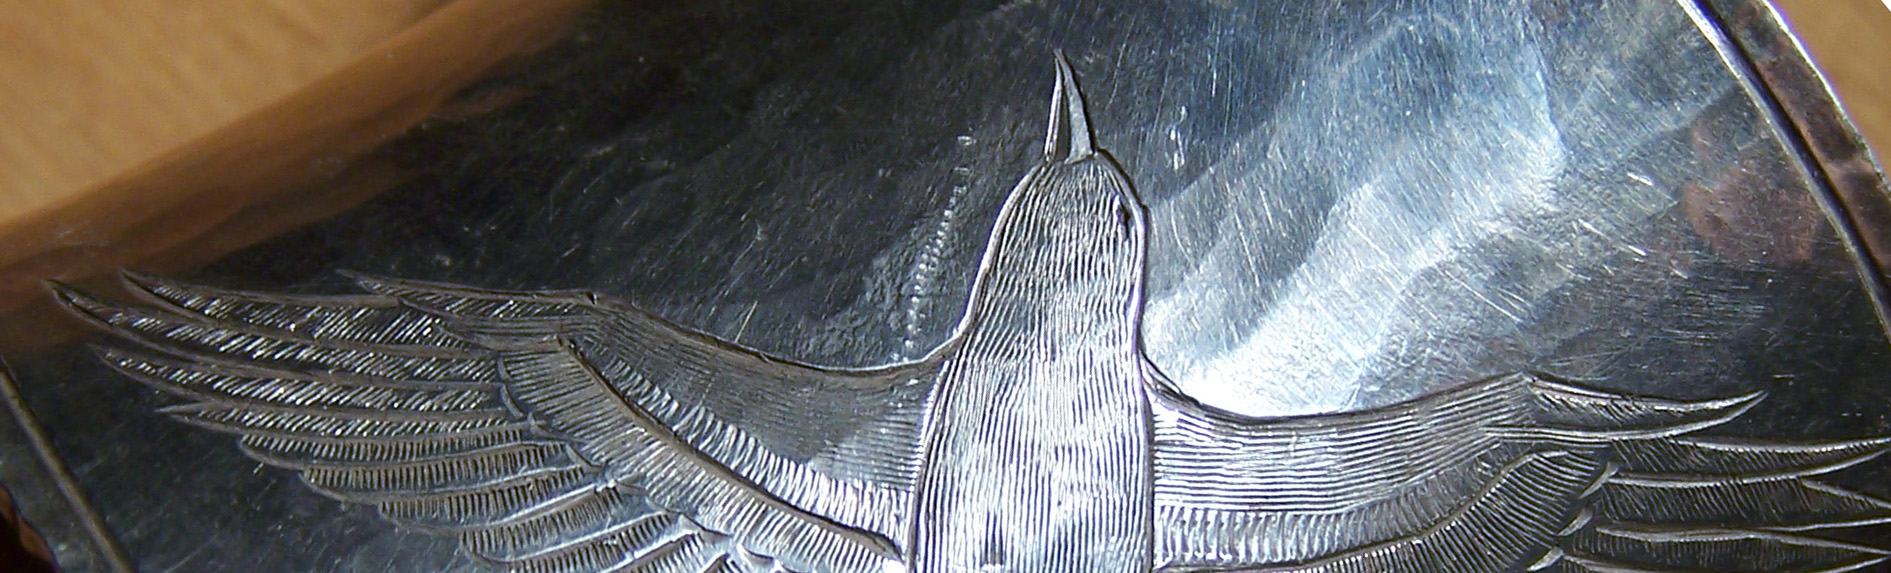
Mastering engraving is a lifetime endeavor, but like most such arts the basics can be learned in a fairly short time, and after that repetition and careful practice increase skill. There is a lot of embellishment that can be done with relatively little engraving experience, and engraving can add a great deal of interest to your designs. In this two-day workshop we will start with tool setup and layout and then explore hand engraving, wriggle cut, and hammer driven engraving. We will work with a variety of methods for holding the work piece and a variety of schemes for pattern transfer. Lettering, gunmetal engraving, and inlay work will not be covered. Each student will take home a basic set of gravers fitted to their own hands and a whole new range of options for decorating their designs.
Students should bring a sketchbooks, and magnifying visors if possible, and will be provided with metal practice plates, and the tools to get started.
Pewter Casting in Soapstone
In this workshop students will progress from the bare basics of pewter casting, and work up to casting complex shapes in multiple-part keyed molds. We will cover one-part, flat-backed molds and the basics of pewter casting, producing a one-sided flat casting. We will progress to two-part, keyed molds, creating castings with surface details on both sides, and we will explore keying strategies and the use of multiple part molds, to cast complex shapes.
Students will be expected to bring earplugs, dust masks, and safety glasses. I recommend bringing sketch books for taking notes and working out designs. I also recommend aprons, bandannas, hair ties, and leather shoes to help keep both students and their clothes clean and safe. Pewter for casting, soapstone for carving molds, and lead for casting keys will be provided.
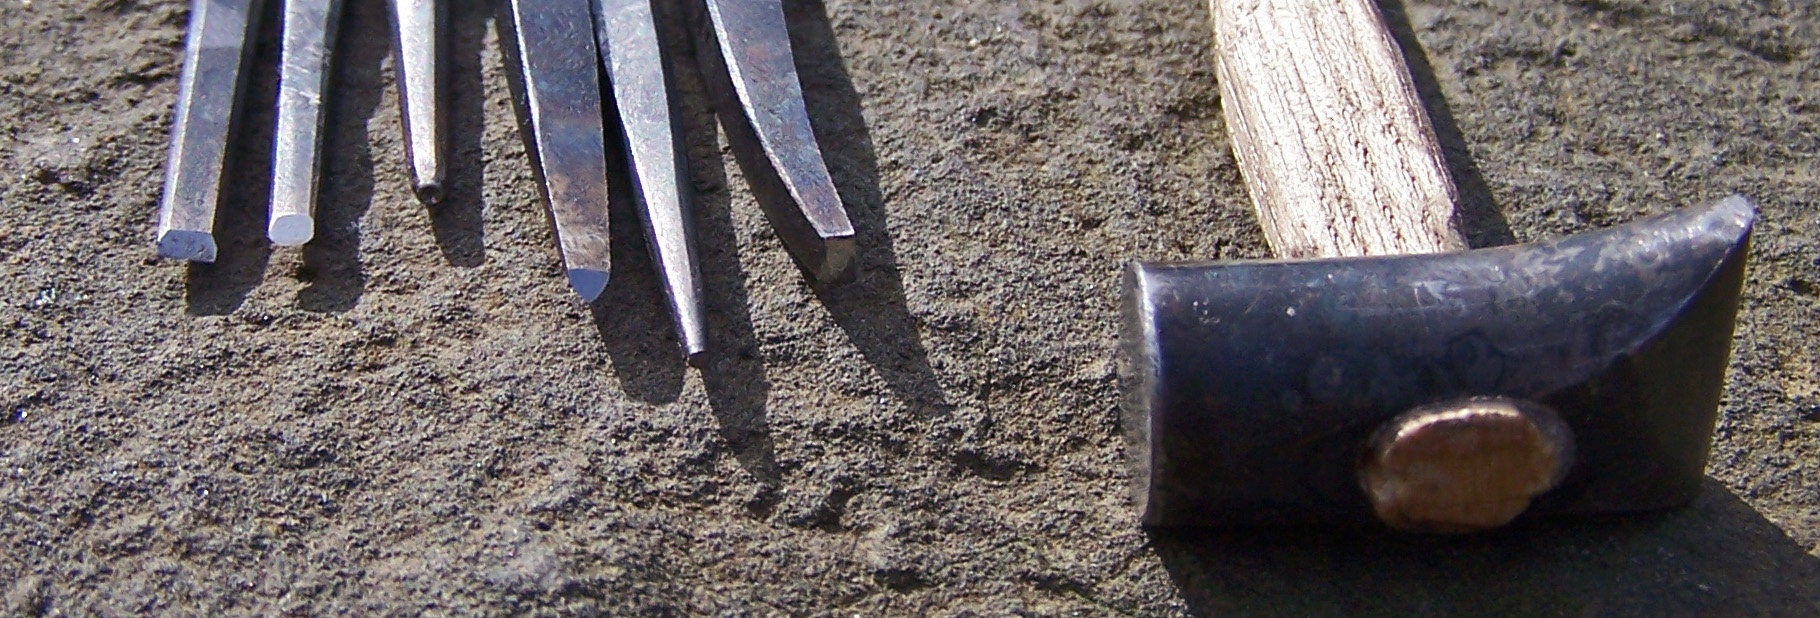
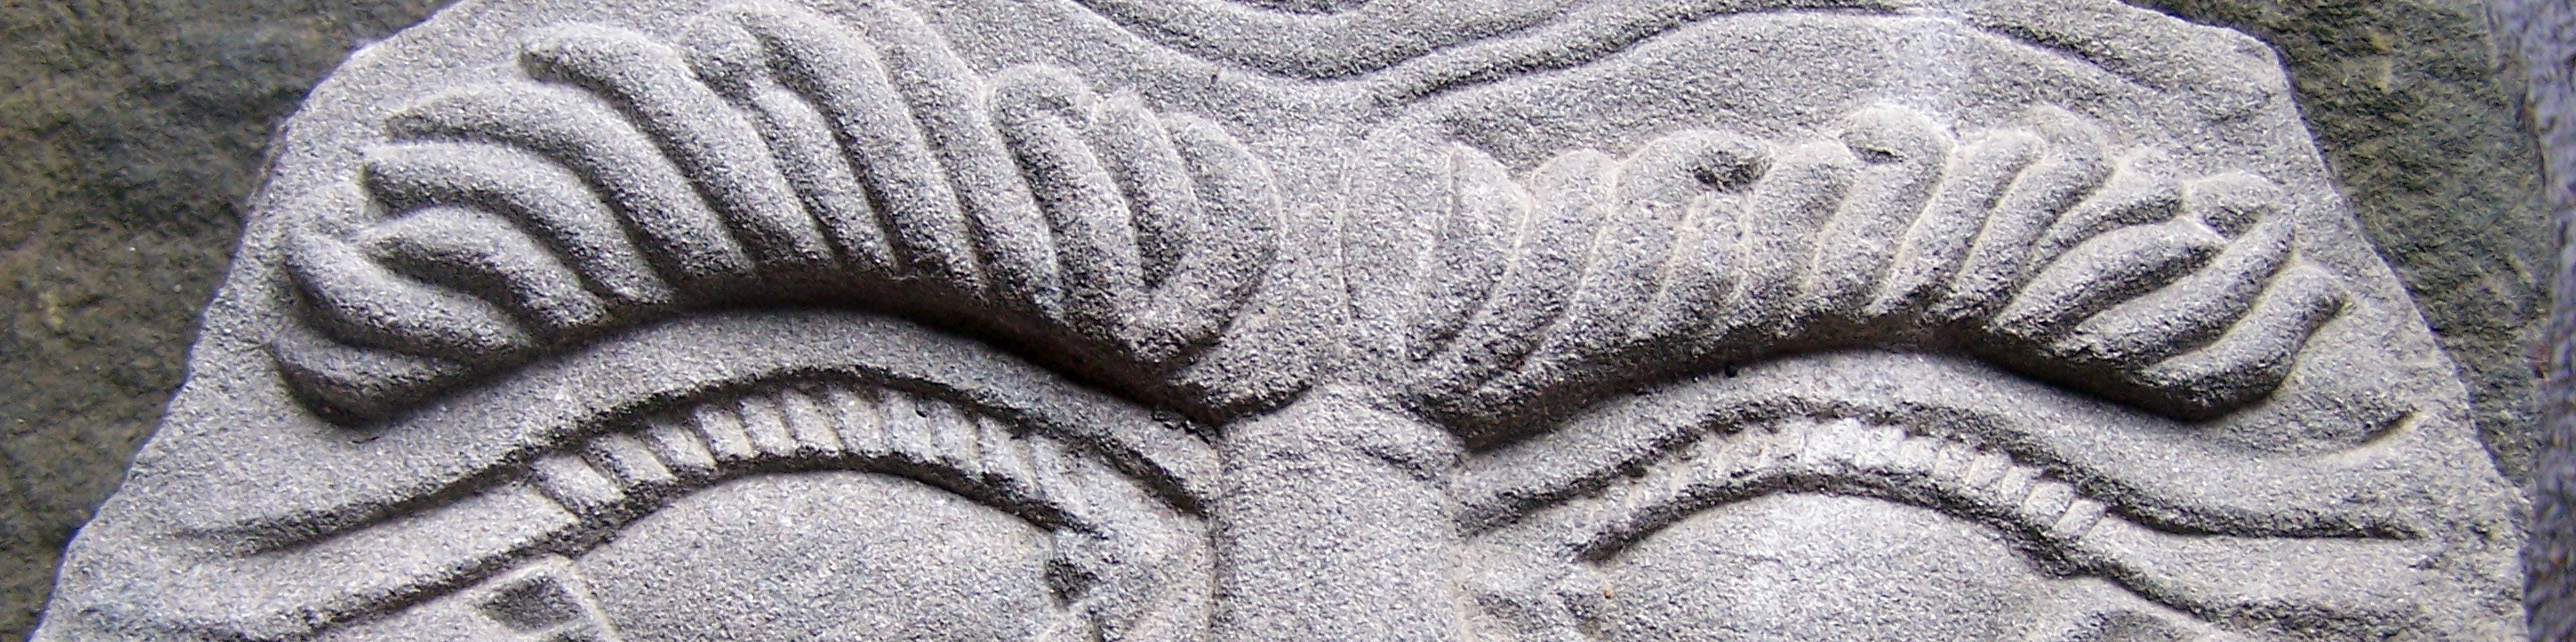 Traditional Carving in Stone
In this workshop we will start by learning to make and maintain traditional hammer driven stone cutting tools. Then we will proceed with design and layout and carve our designs in Sandstone. The focus will be on designs and techniques useful for architectural elements such as keystones and corbels and for garden art. If there is interest we will arrange a free day trip to stone yards and sculpture parks in the area at a later time.
Students should bring safety glasses, gloves and sturdy shoes. Stone will be provided.
Tool Making – A Series of Weekend Workshops
These classes cover the basics of tool making on a scale useful to jewelry makers, and other metal artists. They need not be in any particular order, and though they work well as a series, each can be a stand alone. Students need not have a great deal of experience, but some skills are helpful. For the chasing tool workshop it is good to be familiar with the use of a file, in the pattern punch class some engraving experience is helpful, and for making the Japanese tools it helps to be accurate with a hammer. In all of these workshops tool steel will be provided.

1 – Chasing Tools
In this money saving workshop students will make several simple chasing tools, and gain the skills to create and customize a range of tools both for the jewelry shop and more general uses. The workshop will cover metal shaping techniques, including forging, stock removal; heat treating and finishing tools for chasing and repousseé. Students will learn to make broad pushers, fine chasing punches, and matting and texturing tools. These these skills provide the artist with a whole new range of options, allowing him or her to create or alter tools to suit the task at hand.
Students will be expected to bring earplugs, and safety glasses. I also recommend aprons, bandannas, hair ties, and leather shoes. Steel for making several simple tools will be provided.

2 – Makers’ Marks and Pattern Punches
Tooling metal with hammer driven punches is a tradition around the world, from Navajo jewelry, to the hallmarks on English silver. In this workshop students will learn to design, create and finish decorative punch tools, and personal makers’ marks. Techniques involved will include engraving, die sinking, and lots of file work.
This workshop involves lots of close work so I recommend bringing visors or other magnification. Students should bring earplugs and safety glasses, and I also recommend aprons, bandannas, hair ties, and leather shoes. Tool steel will be provided.
3 – Traditional Japanese Tools
Asian metalworking traditions differ somewhat from those in the west. In Japan goldsmiths typically will make many of their own tools rather than buying them pre-made. The blanks they use are small, and well balanced, tapering toward both ends, and forged from carbon steel. They are simple to make tools from, and easy to heat treat and finish, but can be hard to come by here.
In this workshops students will have the opportunity to learn to make a variety of traditional tools, including chasing punches, and kebori. We will also cover the use of these tools and how to forge the blanks in the first place. Steel will be provided, and I recommend the same safety gear as in the other tool workshops.
Designing Successful Castings – A Scientific Approach
Learn to create patterns that work every time both for custom work and production. Whether you do your own casting or send your masters out, there is no substitute for a design that is well thought out and takes into account the physics of the process. In this workshop we will cover basic waxwork, spruing schemes, mold making strategies, and treeing for both vacuum and centrifuge. We will cover the physical differences between various metals and the design accommodations they require. In addition, each student will carve one design in wax to be molded and cast between the first and second session. We will then finish the casting as a master. We will also troubleshoot molds and inject waxes for treeing. Students who wish may send out their trees to be cast.
Fundamentals of Hollowware – A Series of Weekend Workshops
Starting with an introductory session, these classes will cover the diverse techniques and traditions used in the creation of practical and artful objects with hollow forms. After completing the introduction, students may take some or all of the workshops that follow in the series. Students who complete all the workshops will have the breadth of knowledge to choose the techniques that best fit any project, and execute that project with skill and flair.
In all hollowware workshops students will be provided with sheet metal, and should bring earplugs, safety glasses, and sturdy clothing and shoes.
1 – Introduction to Hollowware Techniques
This workshop covers the basic techniques common to all hollowware work, including layout, proper annealing, boughing, plannishing, and simple finish work. We will not cover edge finishing or patinas in depth in the introduction. Forming techniques in this workshop will include sinking and hammer stretching, allowing students to complete at least one copper vessel.
2 – Hollowware – Fabrication
In this workshop students will learn the tricks for assembling vessels without need for the time involved in raising a hollow form. This is an opportunity to practice complex soldering and brazing, as well as working with extruded tube and other pre-formed parts. Each student will have the opportunity to complete at leas tone fabricated vessel. Introduction to hollowware or an equivalent must be completed before taking this workshop.

3 – Hollowware – Angle Raising
Students can explore this most versatile process in the field of metal forming. Angle raising allows the artist to create deep complex designs, even forms that are nearly closed. Additional techniques that will be covered include: differential anealing, edge thickening (caulking), forming simple spouts, and much more. Students may finish a simple raised copper vessel, or embark on a more complex project to be finished later. Introduction to hollowware or an equivalent must be completed before taking this workshop.
4 – Hollowware – Crimp Raising
This is the fastest way to raise basic forms, cutting hours from the early stages of many projects. Students will learn to move metal selectively, quickly, and with purpose. Additional techniques covered in this workshop include: counter raising to thicken the base of a vessel; asymmetric raising; edge thinning to create a ruffle. Students may complete a copper vessel, or start a more complex project that involves other techniques. Introduction to hollowware, and angle raising or theie equivalent must be completed before taking this workshop.

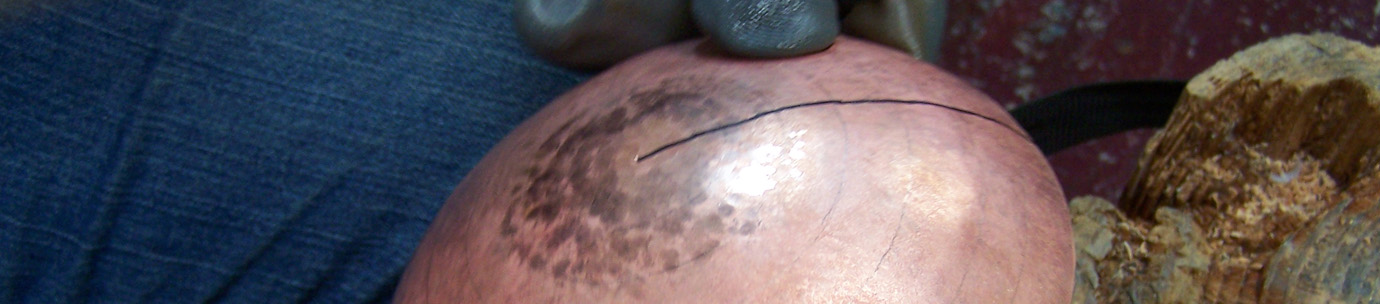
5 – Mixed Media in Hollowware
Throughout history non-metallic work and even found objects have been fitted with metalwork to create vesselsfrom the functional to the fanciful. Egg cups and drinking horns; neffs, maizers and chalices, are but a few examples. In this workshop we will focus on the cold connections involved in attaching metalwork to non-metallic elements. Students may bring their own non-metallic objects, such as horns or turned wooden bowls, or may practice on coconut shells provided. Introduction to hollowware or equivalent is helpful, but not required for this worksop.

Introduction to Inlay
Metal inlay techniques have been practiced both in Europe and the Far East for centuries as a straight-forward means to ornament everything from jewelry to ceremonial axes. They allow the metal artist to securely apply contrasting colors of metal without heating the work thus the inlay process allows the finished pieces to remain hardened. Simple patinas can be used to enhance the decorative images by creating vivid contrast. Begin learning these traditional techniques in this introduction workshop focused on decorative line inlay. Field and dot inlay will be touch on as well providing additional options to explore. Specialized tools are used for this technique. These tools will be provided for class and will be available for purchase.
